The WordPress Dashboard (or the backend of your website) is where you will be doing most of the edits to your site. In the dashboard you will be able to create and edit pages and posts, add images and videos, use categories and tags to organize content for your readers, and also customize your theme.
To access your WordPress Dashboard type in the domain of your website followed by /wp-admin (example https://sites.clas.ufl.edu/abcdef/wp-admin/). Here you will be taken to the login page that looks like the image below:
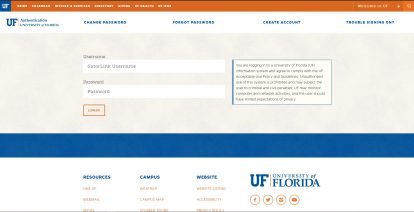
Enter your GatorLink and Password in order to access the dashboard.
Once you have entered your information and it has been validated, you will be automatically taken to the WordPress Dashboard.
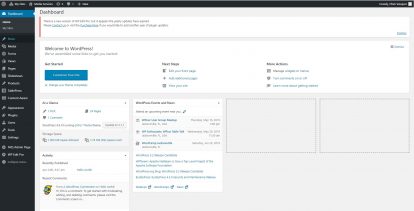
Your menu on the left hand side might look different depending on the role you have been assigned and the plugins that are active on your site.
Commonly Used Menu Items:
- Dashboard – Brings you back home to the dashboard
- Posts – Here you can create posts (Usually for your News or Blog page)
- Media – Here is where all of your media files will be stored (images, videos, documents, etc.)
- Forms – Your forms that are on your site can be viewed here
- Pages – Create static pages for your site (About us, Services, Contact us, etc.)
- Slideshows – Create slideshows to display multiple images
- TablePress – Create responsive tables to display data
- Appearances – Change your theme, edit widgets and menus
- Plugins – Activate and deactivate plugins (User role specific)
- Users – Manage users